RadioMaster have a new baby transmitter. Yes, it's the Zorro! You'll probably already know that it's packed with features, supports OpenTX and EdgeTX, and comes with a choice of Multiprotocol or ELRS modules.
However while most of the Zorro reviews focus on its use with drones, this review takes a different approach - it's geared towards pilots of sailplanes, DLG and electric gliders. If that sounds like you, then read on!
In the box
|
|
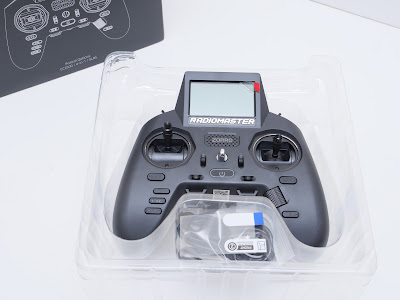
What you get! |
My Zorro arrived direct from China in a cute little package. Inside were the following:
- Zorro transmitter with internal '4-in-1' MPM
- USB cable (USB-A to USB-C)
- Velcro strap for external battery
- Screen protector
- A5 leaflet
- 2 x 18350 batteries
- 1 meter cable and clip for external battery (also available as an extra)
The last two items are not always supplied with newer sets.
Build quality and general ergonomics
The Zorro is the first 'game console' style transmitter that I've used, and I have to say it feels very comfortable in the hand.
Stick spacing is a generous 90mm so it doesn't feel cramped (one of the weaker points the TX12), and the transmitter is perfectly balanced when hanging from a neck strap.
Build quality is rather good for a budget set. Most of the shell is satin black, while the battery covers have a luxurious rubberised coating.

|
| RadioMaster Zorro |
Switches and pots
The Zorro is well equipped with switches and pots. That said, the switches are quite short and not as easy to operate as those on a 'full-size' set like the TX16S.
The layout is okay, except for the front 3-pos switches which - as a thumber - I fnd a little awkward to operate.

|
| Switches and pots |
The pots at the top are better described as ‘rollers’. The centre position is marked, but there is no centre detent. I found them okay for camber control, however I would be less inclined to use them for throttle control.
The top-mounted momentary buttons are good as DLG launch buttons. The buttons at the rear are flush with the surface, and require a more deliberate action.
Antenna
The antenna is hinged. When not in use, it can be parked along the top of the case. The exposed portion is noticably shorter than the one on my TX16S.

|
| 2.4 GHz Antenna |
Gimbals
The gimbals have Hall sensors, which is nice to see on a budget radio.
Spring tension out of the box was too strong for me. Once adjusted, however, the gimbals feel very nice. They're well positioned too - as a thumber, I have no trouble reaching the extremes of travel.
The stick shafts have M3 threads. The stick tops are plastic and rather skinny, and I've replaced them with castellated metal tops.
Each gimbal has a pair of adjuster screws, accessible via holes in the back of the case. These adjust the vertical (throttle/elevator) axes only. The right hand adjuster of each pair is for the self-centring spring - clockwise to disengage for throttle operation. The left hand adjuster is for the friction strap (rather misleadingly referred to as 'spring tension' in the graphic below).

|
| Mode 1/2 switching adjustments |
In addition to the rear adjusters, there are two more at the front. These are for setting vertical travel limits - the gimbals must be recalibrated after this adjustment.

Adjusting stick tension
There are no external adjusters for spring tension - you have to open the case first. Moreover, to adjust the vertical (elevator) tensioner you also have to release the main board.
Before attempting this, I would recommend watching the video linked at the end, which explains the procedure.
Light and sound
The 128 x 64 pixel monochrome LCD screen is generously sized, with good contrast. If I was to nitpick, it's a little slow to refresh leading to some tearing during transitions.
Sound through the single speaker is clear, with adequate volume.

|
|
Size comparison with TX16S |
Programming controls
The programming controls follow the usual RadioMaster convention, including their signature double PAGE keys (for forward and back), and a nicely weighted click-roller. All keys have a nice positive action.
If I have one criticism about this layout, it's the location of the RTN (cancel) key at the top of the left. Even after many hours I find myself hitting the RTN key instead of PAGE. Also, the legends are recessed, and not so easy to read in poor light.

|
| Programming buttons |
RF options
The Zorro is available with a choice of three RF modules:
-
MPM / CC2500: supports ACCST, HOTT and some others.
-
MPM / 4-in-1: as above, plus DSM-2, DSMX, SFHSS, M-LINK and others.
-
ELRS: long range 2.4 GHz protocol.
There is also a bay for a 'nano' style external module.
MPMThe MPM uses well proven open source firmware. It emulates a number of standard protocols, making the Zorro compatible with a wide range of receivers. All the main emulations including Spektrum, ACCST are generally considered to be highly robust - I've certainly not had any issues using ACCST.
FrSky protocols
If you use FrSky ACCST receivers then you’ll love the MPMs’ capabilities! Both versions of the MPM support D8, D16 v1/v2.1, LBT and FCC.
The nice thing is that the protocol can be set individually for each model. This is far more flexible than FrSky's own transmitters where the protocol is set in the firmware and must be used across all your models.
Note however that the MPM does not support the newer ACCESS protocol.
MPM frequency tuning

MPM with Spektrum DSM2 selected
'Capture' cloning of DSM and ACCST
The MPMs offer a 'clone' facility, whereby the MPM can capture the
global ID of another transmitter running DSM or ACCST.
This is done by binding the MPM in the special 'RxClone' mode. Once the
GUID has been captured, the MPM is able to mimic the source tx. This
means you can swap between the Zorro and another DSM or ACCST
transmitter, without the need to rebind! Very useful when migrating from a DSM or ACCST
transmitter.

MPM with FrSky D16 in 'cloned' mode
Hardware cloning
It's also possible to do a hardware clone of a second MPM. This allows
you to swap with another MPM-equipped transmitter without the need to rebind or capture signatures, and regardless of protocol. (Note that the second
transmitter must have an MPM - hardware cloning is not possible with a
non-MPM transmitter.)
To do a hardware clone, you run the MultiConfig script on the
transmitter with the source MPM and make a note of two global ids. Then
run the script on the second transmitter, copying and saving
the global ids to the second MPM.
The MultiConfig script also allows you to reset the global ids to their
original values. This should be done before passing your
transmitter on to a new owner.
Spectrum analyser
The MPM also provides a spectrum analyser function, accessible from the
Tools menu of Open/EdgeTX.
ELRS module
The 2.4 GHz ELRS version offers higher range compared with regular 2.4
GHz protocols. However it suffers from reduced resolution, especially on
channels 5 and above. It's targeted primarily at drone pilots, so
I won't consider it further here.
[edit: ELRS v3 has high resolution modes for the high channels,
and is showing promise for PWM servo and LoS applications].
|
|
| MPM with Spektrum DSM2 selected |
'Capture' cloning of DSM and ACCST
The MPMs offer a 'clone' facility, whereby the MPM can capture the global ID of another transmitter running DSM or ACCST.
This is done by binding the MPM in the special 'RxClone' mode. Once the GUID has been captured, the MPM is able to mimic the source tx. This means you can swap between the Zorro and another DSM or ACCST transmitter, without the need to rebind! Very useful when migrating from a DSM or ACCST transmitter.
|
|
| MPM with FrSky D16 in 'cloned' mode |
Hardware cloning
It's also possible to do a hardware clone of a second MPM. This allows you to swap with another MPM-equipped transmitter without the need to rebind or capture signatures, and regardless of protocol. (Note that the second transmitter must have an MPM - hardware cloning is not possible with a non-MPM transmitter.)
To do a hardware clone, you run the MultiConfig script on the transmitter with the source MPM and make a note of two global ids. Then run the script on the second transmitter, copying and saving the global ids to the second MPM.
The MultiConfig script also allows you to reset the global ids to their original values. This should be done before passing your transmitter on to a new owner.
Spectrum analyser
The MPM also provides a spectrum analyser function, accessible from the Tools menu of Open/EdgeTX.
ELRS module
The 2.4 GHz ELRS version offers higher range compared with regular 2.4 GHz protocols. However it suffers from reduced resolution, especially on channels 5 and above. It's targeted primarily at drone pilots, so I won't consider it further here.
[edit: ELRS v3 has high resolution modes for the high channels, and is showing promise for PWM servo and LoS applications].
Internals
Opening the case involves undoing eight small self tappers, pulling the back off, and carefully disconnecting two cables from the batteries.

|
|
Internals |
The internal components are quite densely packed, yet everything is neatly organised. The solder joints at the switches and gimbals are well supported.
The RF board is hidden underneath the main board.

|
|
Good support for soldered joints |
Hardware calibration
On both sets I've used, one of the analog controls only worked over half its travel. Fortunately it was just due to a lack of calibration at the factory. As good practice, I would recommend checking calibration as one of the first tasks with a new set. (Go to the System/Hardware menu, scroll to the bottom and select 'Anas'. Each analog control should span -100/0/100.)
Operating system
The Zorro can run either OpenTX or EdgeTX. Both systems have the low-res version of the interface, where some menus are split into sub-menus. This makes navigation less convenient compared with radios with higher res screens.
My Zorro came with EdgeTX 2.6.0 installed. Unfortunately my first attempt at migrating my models from my TX16S (running OpenTX) didn't go well due to bugs in EdgeTX.
Flashing OpenTX 2.3.15 solved the problem, and this is the operating system which I would recommend if using the 4-in-1 module. (Tip: if the scroll wheel works in reverse, you can correct this in system settings.)
Edit: Since writing the review, EdgeTX 2.7 has been released. This version is more stable, though there are still a few annoying bugs.

|
|
Nightly build of OpenTX 2.3.15. Production version of 2.3.15 is author's choice. |
Connectivity

|
|
TOP FLAP: Anticlockwise from top left: 3.5 mm headphone jack, micro SD card, USB-C/data, DSC trainer |

|
|
BOTTOM FLAP External 2S battery port USB-C charger part |

|
| External module bay for Crossfire, ELRS etc. |
Batteries and charging
There are two LiIon batteries, one in each grip. In order to keep the Zorro compact, RadioMaster have had to compromise a little - each battery is 18350 size for a nominal capacity of just 900 mAh. Compare this with TX12 and TX16 which take 2 x 18650 cells with a typical capacity of 2500 mAh.
In terms of operating time, I've seen four hours quoted for the MPM versions. The ELRS version draws more current - expect around two hours depending on power output.
Charging is easy via the USB charging port... connect the cable, wait for the LED indicator to go out... done! The rubber flap covering the charging port is a little fiddly, but it does click into place with a little coaxing.

|
| The Zorro takes two 18350 batteries |
Extending the operating time
I find the supplied 18350's perfectly sufficient. However, there are ways to extend the operating time.
First, an external 2S 18650 pack can be fitted under the unit, using strips of Velcro (supplied). Connection is via the balancer port at the bottom of the unit. Although not stated in the manual, reports indicate that the internal batteries can co-exist with an external power source - current is drawn from the source with higher voltage.
Alternatively, you can connect an external battery via a special one-meter cable. The benefit of this method is that there's no limit to the size of battery. One end of the cable connects to the battery via an XT30 connector; the other end plugs into the balancer port. The cable is secured to the transmitter via a plastic clip. My first Zorro was provided with the cable, but it was absent in the second, however it is available as an extra.
The third method is simply to carry a spare pair of 18350's. While it may seem the obvious approach, removing then replacing the battery cover is rather awkward. You have to squeeze the sides and push down firmly, while sliding into place. If you get it wrong, the covers don't align with the body, and can slide off easily. My advice would be to fit the batteries, and leave them!
Flight tests
The first test was a demanding one - to control my number one F3F competition model, a Pike Precision 2 with a FrSky RX6R receiver. The Zorro was running my F3F setup and crow aware trim script.
No problems were experienced. This is pretty awesome - we're talking about functionality on an £80 radio which will out-perform a £1000 plus Jeti. Would I routinely use the Zorro for this? Well no - the TX16S is more comfortable, but what the heck, it was fun - and a talking point on the slope.

|
|
Zorro showing crow aware trim script. Author's Pike Precision 2 in the background. |
Verdict
Despite some compromises due to its small size, I really like the Zorro. It has a certain charm. If it were a car, it might be a 'premium mini SUV'.
The Zorro is more comfortable to hold than the TX12, has more controls, and a better screen position. However the TX12 uses larger 18650 batteries. Also, the Zorro accepts nano modules, while the TX12 supports the older and larger JR-style modules.
To sum up:
Pros:
- Comfortable in the hand
- Excellent support for different RF protocols (4-in-1 version)
- Large, high mounted screen
- Gimbals
- DLG-friendly controls.
- Switches are a little fiddly
- Awkward adjustment of spring tension
- Tricky battery covers
- Lower range than TX16S (may just be an issue with my unit)
All in all, the Zorro pushes the boundaries of what's possible with a small transmitter. It's a fine choice for pilots who fly a mixture of models, like DLG, drones and slope soarers - and who like to travel light.
Links
- RadioMaster - RadioMaster's web site
- MPM project - multiprotocol module project
- OpenTX Clinic - Tutorials and templates for OpenTX and EdgeTX
- RadioMaster TX12 review
- RadioMaster TX16S review
- Zorro gimbal adjustments - video
Full disclosure - RadioMaster provided me with a Zorro free of charge to evaluate and keep. RM did not seek or receive access to this review prior to publication, and all opinions are my own.
10 comments:
Can one power via a USB C cable to a cell phone style external battery pack?
The USB C ports are for data and charging, not for power.
Hi just ordered one based on your review from Banggood. Looking for a receiver with barometer for altitude. Found this one. https://www.t9hobbysport.com/frsky-g-rx8-receiver
Can you recommend links with any available that I can purchase
I think you've answered your own question: T9 stock these, as well as the G-RX6.
Hi, my Zorro comes with EdgeTx installed. How can i downgrade it to OpenTx? Thanks!
@Leo too long to describe in a single comment. Best to ask for advice on the Zorro forum on RC Groups
Great review of the Zorro! I love mine but haven't used it on any large models yet. Have you been able to test a different unit to see if the range issues are unique to your sample or a design problem?
@YaniCan Thanks! I haven't had access to another unit to check, however I've not heard of any other similar reports so it's probable that my unit is sub-standard. It's still my go to radio for DLG.
I love the design of the Zorro. IMO better than all other RM offerings. However design is let down by the choice of battery. 18350 cells not readily available, and RM only selling a 900mAh capacity cell when 1600mAh are available. I believe that flat top cells are now the only ones that fit. Build quality may have dropped as recent reports of Zorro's with RTC issues might indicate production issues or cost cutting through cheaper components. E.g. i know that non stm32 ARM processors are fitted in the 4in1 modules. If you're interested in RM electronic hardware design, there is a blog online where the TX16s is reversed engineered.
wow
Post a Comment